Noobs Guide to Installing RetroPie 3.7 with LXDE and KODI for Raspberry Pi Zero,1,2&3
RetroPie has grown alot in the last year. Past version 3 it has become far more robust and supports more systems than ever. A feature that RetroPie has which makes it very versatile are modules that you can access right inside the RetroPie menu.
**This tutorial is for noobs and will show you how to:
Add LXDE DESKTOP to RetroPie
Add KODI to RetroPie
Easily add roms to RetroPie **
What is LXDE?
LXDE is a full desktop environment which has a file manager, web browser and other useful utilities. Based on Raspbian, it is very similar to the desktop experience you may already be used to. You could also install programs like Libre Office (A Microsoft Office Replacement). It's like having your own separate computer right inside RetroPie! This also makes it incredibly useful for adding and removing roms on your pi using usb drives.
What is KODI?
KODI is the most developer supported media player software available. It is incredibly simple to use and very user friendly. It also uses the GPU on the pi to enable smooth playback of large video files. This includes large 10+GB bluray rip .mkv files. KODI also has additional addons that allow features such as live streaming of radio, sports, news and entertainment channels.
So, as you can see, it is possible to have the best emulation software, with the best media player software along side a decent desktop environment all on a single Micro SD card running on a pi.
What do I need?
A pi that has ethernet or wifi capability. There are a few options:
Pi Zero - USB hub with a USB wifi dongle
Pi1 - Ethernet or USB wifi dongle
Pi2 - Ethernet or USB wifi dongle
Pi3 - Ethernet or built in wifi or USB wifi dongle
NOTE: You cannot be 40 feet from your wifi source! These wifi antennas are not very strong. You should try to be around 10 to 15 feet maximum from your wifi signal. If there are walls in the way, you will have a weak signal. Every building is different, but use common sense. Your cell phone has a much better antennae than a pi.
What is the easiest? Ethernet. Why? No password or selecting networks. No range or signal issues. It works immediately and is usually faster. Wifi requires entering passwords. Not really a big deal.
**What wifi dongle should I use? **The only wifi dongle that is pretty much guaranteed to work is called the Edimax EW-7811Un. There are many others that work just as well if not better, but you can basically trust that this dongle will work with your pi under almost any situation. It is listed hundreds if not thousands of times across various Raspberry Pi forums. It costs about $10 US.
What additional hardware do I need?
1 or 2 USB cabled game controller(s)
1 or 2 Micro SD cards (because more is better)
1 usb thumb drive (to copy roms and play videos)
1 keyboard (you need to type)
1 mouse (not required, but using a desktop environment without one is not fun.)
**What software do I need?
You will need the below software for any Raspberry Pi related things you do in the future, even outside of this tutorial.**
7-Zip (free)
http://www.7-zip.org/download.html
SDFormatter (free)
https://www.sdcard.org/downloads/formatter_4/eula_windows/
Win32DiskImager (free)
https://sourceforge.net/projects/win32diskimager/files/Archive/
Okay I'm ready. What do I do first?
Step 1.
Install all software mentioned above.
Format your micro SD card using SDFormatter.
Step 2.
Download RetroPie. (The file will be a .gz file. That is normal)
https://retropie.org.uk/download/
Step 3.
Right click the .gz file, roll over 7-zip, Open Archive. Click to open.
You will see an .img file. Drag it onto your desktop.
Step 4.
Insert your Micro SD card. Open SDFormatter. Format the card.
NOTE: Make sure you have the correct drive letter selected for the card! You don't want to accidentally format an external hard drive you have plugged in!
Step 5.
Open Win32DiskImager. Click the folder icon. Find the .img file on your desktop and select it. Click the "Write" button.
Step 6.
Insert your card into your Pi. Turn on the power. Let RetroPie load completely.
Step 7.
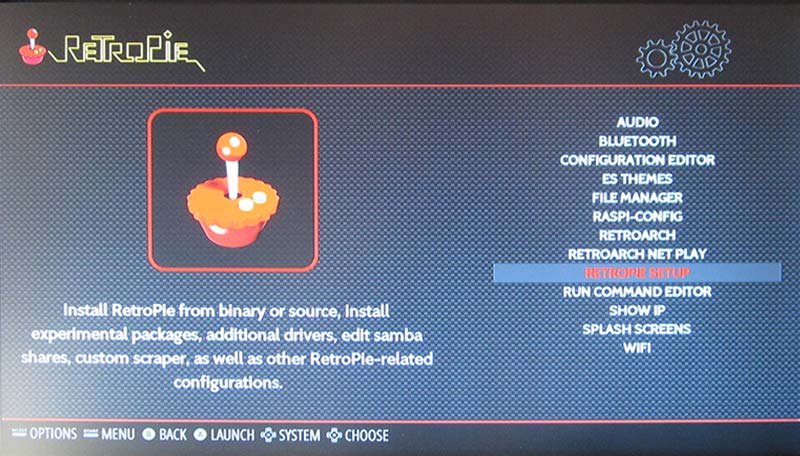
You should first see a screen like this.

Configure your USB game controller by pressing the buttons as you are prompted. If you run out of buttons, simply hold down any button you have already used for each remaining button until you reach the end of the list. At the end press the button you selected as the "A" button and wait a few seconds while RetroPie saves your controller settings.
Alright. The boring part is almost over.
**NOTE:
When navigating the RetroPie menus, button "A" is select/enter, button "B" is back.
The start button is used mainly for configuring more controllers or a keyboard. It also lets you quit or restart RetroPie.
If you want to use the keyboard inside RetroPie for menu navigation etc, you have to configure it similar to how you configured the game controller. To make it simple, assign the "A" button to the "Enter" key and the "B" button to the "" key or something easy for you to remember as "back".
When inside a "blue screen menu" using the "A" or "X" button (controller) is your way to select an option. There is almost "OK" and "Cancel" buttons in these menus. Press "right" on your game controller or keyboard to reach them.
That is the basic navigation of RetroPie. Once you get used to it, you will find it fairly simple to navigate the different areas.**
Step 8. (Skip if you have an ethernet connection.)
NOTE: This tutorial does not address wifi connection issues you may have. It assumes your wifi connection works reliably.
Go into the RetroPie area. Select WIFI. You will enter a "blue screen menu".
"Connect to WiFi network is already highlighted. Press "X" (controller) or "Enter" (keyboard). You should see some wifi networks. Highlight your network and press "X" (controller) or "Enter" (keyboard). Type in your network password and press "Enter" on your keyboard. Wait a few seconds and you should return to the first selection menu, but you will see "Current IP: (with your IP address in it) and Wireless ESSID: (with the name of your network in it). Yay! you are connected! Highlight
"Cancel" and Press "X" (controller) or "Enter" (keyboard).
Installing LXDE
Step 1.
It's time to install LXDE. If you are still in the RetroPie area, select RETROPIE SETUP.
You will enter a "blue screen menu".
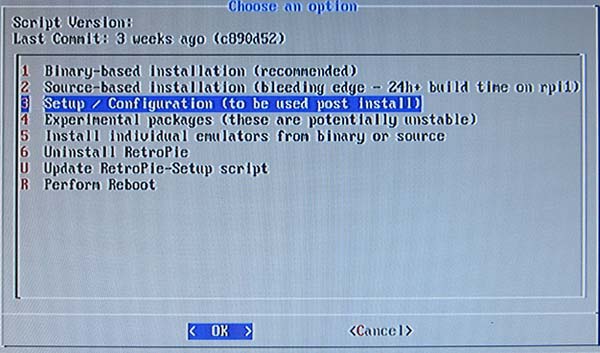
Highlight the option called "Setup / Configuration (to be used post install)" press "X" (controller) or "Enter" (keyboard).
Highlight the option called "Raspbian related tools" press "X" (controller) or "Enter" (keyboard).

Highlight "Install desktop environment (LXDE)" press "X" (controller) or "Enter" (keyboard).

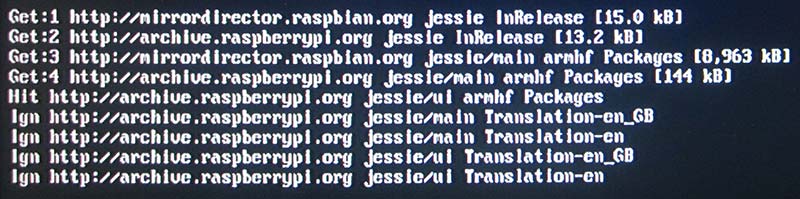
You should see the start of the installation like this
Step 2.
Take a break! Depending on your connection speed it can take between 20 and 25 minutes to install.
Towards the very end of the installation there will be a message that says "*** 99-com.rules (Y/l/N/O/D/Z) [default=N] ?"
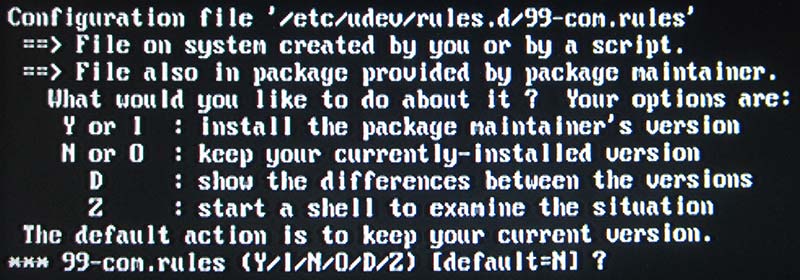
Don't be alarmed. Type "n" and press enter on your keyboard. In about one minute it will be complete!
You will now be back at the "blue screen menu". Highlight "Cancel" press "X" (controller) or "Enter" (keyboard) to get out of the RetroPie Setup. You should now be back inside the RetroPie area. You are done! You now have the LXDE desktop installed! Press the start button, go down to quit, press A, select "RESTART SYSTEM" and press A. REALLY RESTART? YES!
Step 3.
Try out your new desktop! RetroPie should now be restarted and loaded. Go into the PORTS area. You should see "DESKTOP" listed. Select it and press A.
Using LXDE
The first time you run it, you see this.

No you don't need to upgrade anything. It would be nice if that wasn't even shown at all.
Then you will also see this.

Record my history and passwords in a text file.. Hmm... No thank you.
You may be wondering what sorts of things you can do with LXDE. Here is a basic visual example of some nice features already included.
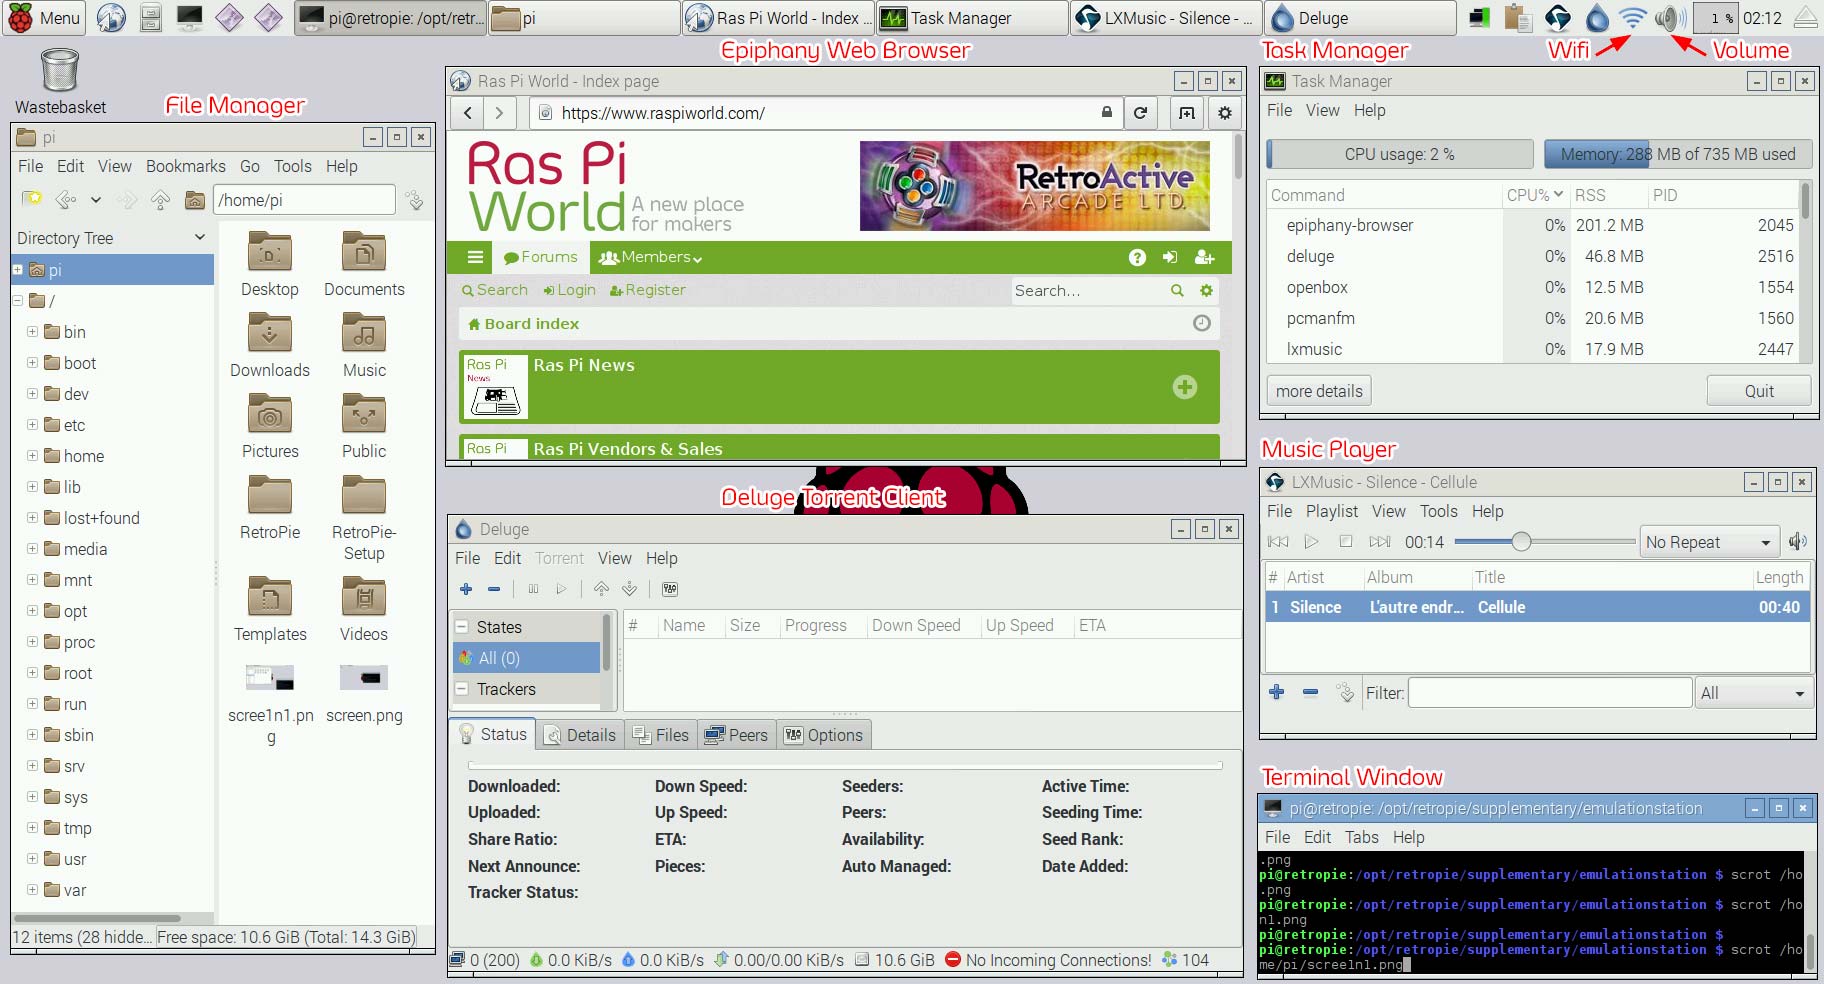
As you can see, it's not too different from Windows or Mac OSX. The most useful application you will use is the File Manager, because you will want to add and delete roms by dragging them from a thumb drive using your mouse. Other nice features included are the Epiphany Web Browser and the Deluge Torrent Client. There is even an included music player (LXMusic) and a video player (Omxplayer). There are other included programs you can explore and play around with. Feel free to play around and see what this new desktop is like.
Limitations. Okay the first thing you are going to do is go to YouTube and try it out. It's not going to be that great. It's okay, but loading and general scrolling is not going to be as smooth as your regular computer. In fact any website that is very heavy with many types of content or java script may be a bit sluggish. If anything this would be the main limitations of LXDE. Over time, with faster pi's being released, this will become less of an issue.
Installing KODI
Step 1.
Go to the RetroPie area, select RETROPIE SETUP.
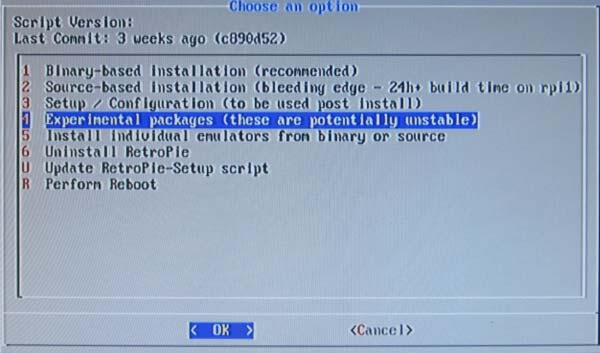
You will enter a "blue screen menu". Highlight the option called "Experimental packages (these are potentially unstable)" press "X" (controller) or "Enter" (keyboard).
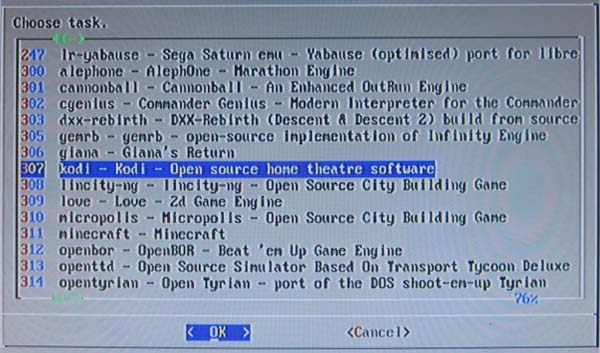
Highlight the option called "kodi - Kodi - Open source home theater software" press "X" (controller) or "Enter" (keyboard).
You should see the start of the installation like this
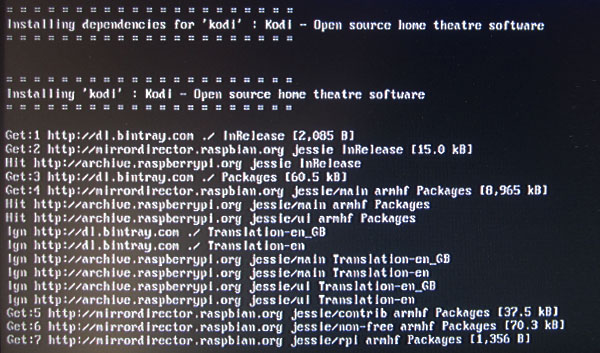
It only takes a few minutes.
Step 2.
You will now be back at the "blue screen menu". Highlight "Cancel" press "X" (controller) or "Enter" (keyboard) to get out of the RetroPie Setup. You should now be back inside the RetroPie area. You are done! You now have KODI installed! Press the start button, go down to quit, press A, select "RESTART SYSTEM" and press A. REALLY RESTART? YES!
Step 3.
Try out KODI! RetroPie should now be restarted and loaded. Go into the PORTS area. You should see "KODI" listed. Select it and press A.
Using KODI
KODI is a very customizable and multifunctional software. This tutorial is not going to show all the different options and uses for it. We will look at the most basic function people use it for which is playing videos from a FAT32 formatted thumb drive.
NOTE: KODI on the Pi prefers drives that have been formatted in FAT32. Doing this with a thumb drive is simple. Doing it with a hard drive is not too difficult. In both cases you will not be able to have video files over 4GB in size on it. Kodi will recognize NTFS hard drives, but not always. To get NTFS hard drives to be recognized every time, involves work which this tutorial will not be covering. There are many tutorials on how to get KODI to read videos over a network, in which case the formatting doesn't matter at all.
This tutorial is assuming that you are using a mouse and keyboard inside KODI.
Playing a Video
Step 1.
Insert your thumb drive.
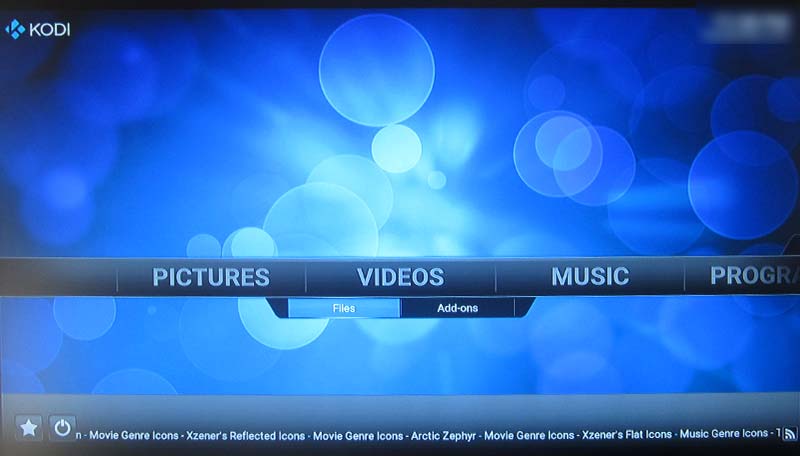
At the main menu you should see a few areas like pictures, videos, music etc. Click on VIDEOS and then Files.
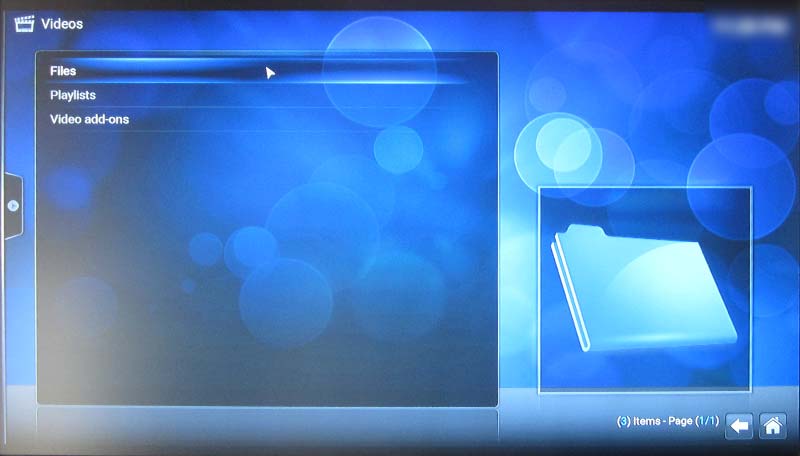
Step 2.
You are in the files area now for videos. Click Files.
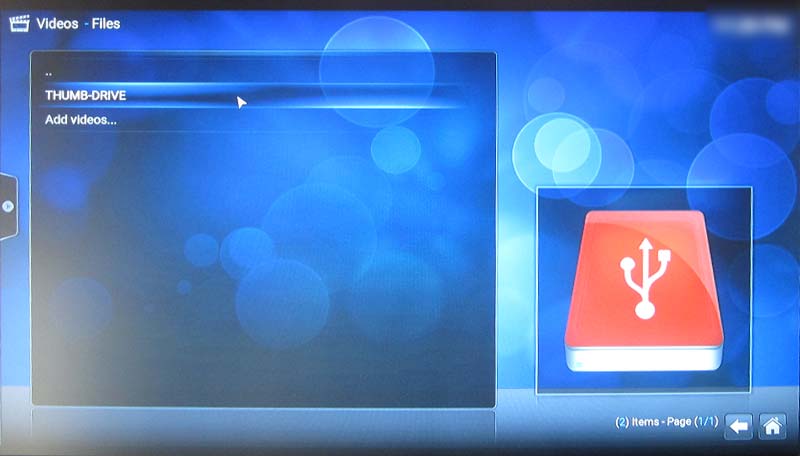
Step 3.
You should see the name of your thumb drive listed now. Click it.
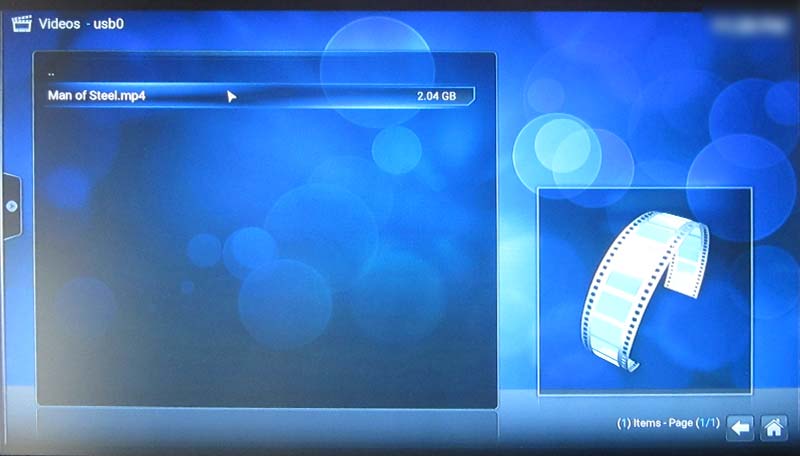
Step 4.
Now you should see any videos you have on the drive. Click any of them to start playing!
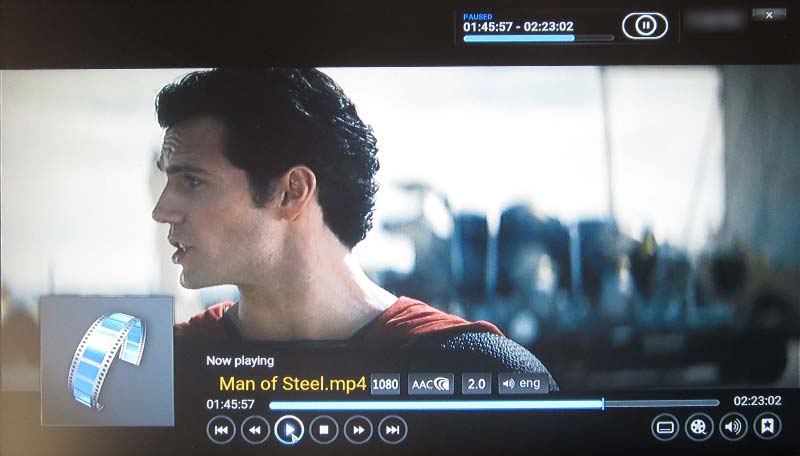
NOTE: When a video is playing moving the mouse will bring up the controls, time line and some other useful information about the video etc. There are many keyboard hot keys you can use to pause, rewind etc. Here are a few useful ones:
Play = P
Pause / Resume = Space bar
Volume up / down = + / -
Fast forward = F
Rewind = R
Change Aspect Ratio = Z
Subtitles On/Off = T
Stop = X
Exit to Menu = Esc
Emergency Kill Exit = S
Exiting back to RetroPie
Press the escape key, and when you are back at the main menu click the Power button. Click Exit and you will got back to the PORTS area or RetroPie.

Adding roms to RetroPie for noobs.
When it comes to playing roms using RetroPie there are three levels of difficulty.
Level 1
Easy. You simply copy roms into a folder.
Level 2
Harder. You copy roms into a folder, but must also have bios files that help RetroPie run the roms for the game system being emulated. You may or may not have to find and edit a configuration file that maps the buttons for your controller depending in the emulator being used.
Level 3
Very Frustrating. All the hassle from Step 2 but additionally, the roms you are using have to be converted to be a certain "version" (MAME) that matches the emulator. You also need a .dat file to use for the specific conversion you are doing. You will also have to edit a key map file like retroarch.cfg to set the controls for your MAME roms. Due to the limitless complexity of these variables this tutorial will not show how to do this. This tutorial is more for noobs who want to play now!
Clearly most people are interested in the most trouble free way of adding roms.
We will first focus on how you can simply add games and start playing immediately. And it is simple.
Level 1 Easily adding roms to RetroPie
Step 1
Ensure you have RetroPie installed and loaded. Find a USB thumb drive and format it. It is VERY important that your format it in FAT32. Don't use a SD card in a reader etc. Just use a regular USB thumb drive.
Step 2
Make a folder in it, re-name it to retropie. That's it. All lower case. One folder only. Done.
Step 3
Put the thumb drive into a USB port on the Pi while RetroPie is running. You can even plug it in before you turn it on. When you do this, RetroPie will start making an large folder structure inside the folder you made on the thumb drive. You will probably see the green light on your Pi blinking very frequently. This is good. It means it is doing it's job. After about 30 seconds, remove the USB drive. Shutdown the pi.
Step 4
Put the thumb drive back into your computer that you have roms on. Open the retropie folder and you will now see new folders named "BIOS" "configs" and "roms" Open the folder called roms.
Step 5
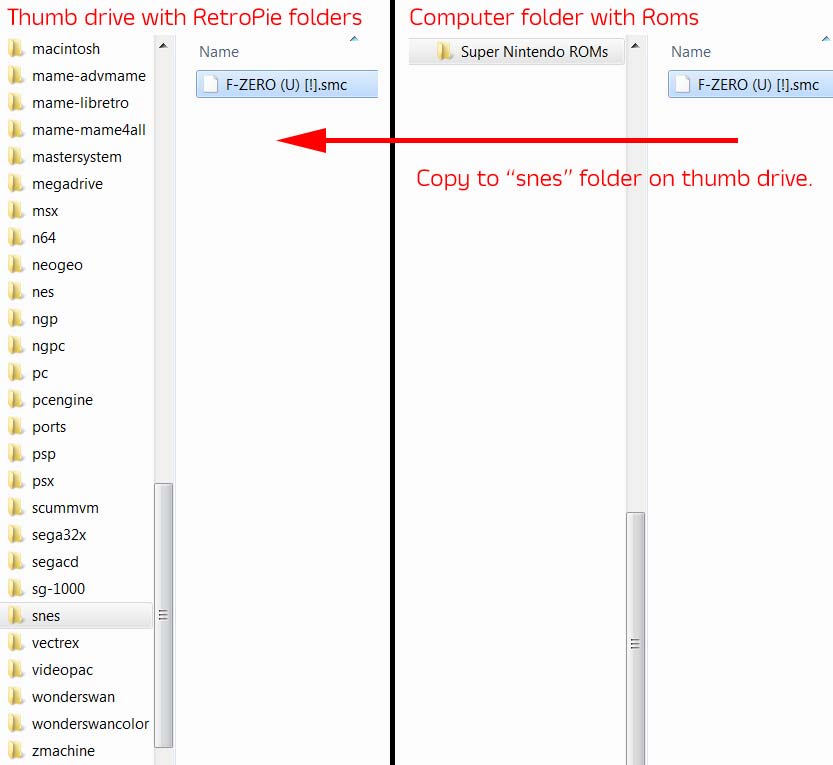
As you can see the list of folders in pretty long. Each of these folders represents a different game console that RetroPie can emulate. With new releases, this list will continue to grow as new game systems are added that can be emulated. Find and open the folder named "snes". This is the Super Nintendo games folder.
Step 6
Drag or copy and paste roms from your main computer over to the thumb drive into the snes folder.
Step 7
With your pi turned off, insert the thumb drive and turn it on. After RetroPie is loaded, you will see a Super Nintendo area has shown up. Go into it and your rom should be there ready to play!
NOTE: This method is the easiest way to add roms, but you should understand it is only to add roms. Do not think of it as a syncing copy like Dropbox. If you remove roms from the thumb drive, when you plug it back into the pi and start RetroPie, it will not delete the roms you removed from the USB stick. Also remember, if you decide to add thousands of roms, it will take a while to add them all to RetroPie. If it took you 20 minutes to copy the roms to the thumb drive, you may want to wait at least 20 minutes before removing the thumb drive. There is no progress meter showing you when it is done. You can look at the green lighting blinking on your pi as a reference, but you don't want to remove the thumb drive while it is copying to your pi. This could possibly ruin the Micro SD card and your RetroPie installation.
Not all emulators work as easily as dropping roms into a folder and simply playing them. Here is a list of a few popular game systems that do. The above steps will work and you can get playing games right away!
Atari 2600
Atari Lynx
MAME4All 0.37b5 (Arcade Games ending around 1993)
Nintendo Gameboy / Color
Nintendo NES
Nintendo Super NES
Nintendo 64
PC Engine (Turbo Graphx 16)
Sega Genesis
Level 2 Adding bios files to the bios folder.
NOTE: Some emulators will actually play roms without a bios file. Gameboy Advance and PlayStation (PSX) are good examples. Some games play fine while others play slowly and have sound issues. Some games won't play at all.
Some emulators also prefer that you have a copy of the bios file inside the roms folder as well. This requires you having to do more file management, which will be covered in "Using LXDE to manage your files"
Step 1.
Put the thumb drive back into your computer that you have bios files on. Open the folder retropie and you will see folders named "BIOS" "configs" and "roms" Open the folder called BIOS.
Step 3
Drag or copy and paste bios file(s) from your main computer over to the thumb drive into BIOS folder.
Step 3
With your pi turned off, insert the thumb drive and turn it on. After RetroPie is loaded, the bios file will have been added to the BIOS folder on the Micro SD card running RetroPie. You should be able to run roms for that system without a problem.
NOTE: Anything involving bios files with different regional versions and roms possibly with different regional versions are always going to be an issue. The more combinations of different files always increases the potential for things not working smoothly. There is no one single solution that makes every single rom play for every system perfectly. If you get games to play well, be happy and enjoy them! If there are a few that simply will not work, you could spend hours or days trying to find the right combination of factors to succeed. It really depends how much time you want to spend trying to make everything work perfectly.
Using LXDE to manage your files.
After using the thumb drive method of copying games and bios files over, you are going to want to have the ability to do whatever you want. Using LXDE you can easily see all the folders on the RetroPie MicroSD card and change whatever you like easily. You can do file management similar to how you would use Windows to do the same thing (with a keyboard and mouse). This is far more time efficient than constantly using the thumb drive method and you will understand RetroPie better overall. Also, since you have a web browser you can have access to information and files to download online, while doing changes to RetroPie, at the same time! That is a huge savings in time!
This tutorial is going to cover only the most basic operation of copying files into folders. It is for noobs that have never really used LXDE and need to know how the folders for RetroPie and a thumb drive are arranged. If you have only used Windows, you will feel mostly at home!
Step 1.
Go to the PORTS area of RetroPie and select DESKTOP. LXDE will start loading.
Step 2.
Let's plug in a thumb drive!
You will see a dialog box asking for Authentication.
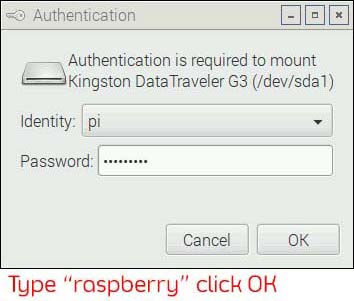
Simply type "raspberry" as the password and click OK.
Sometimes you may see this error.

If your thumb drive is formatted FAT32, you should have no problems. Just ignore it. Never use a NTFS formatted thumb drive.
Step 3.
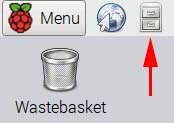
You may see this dialog box show up.

Click OK. If it doesn't show up, open the file manager by clicking this icon
Step 4. Understanding arrangement folders for LXDE and RetroPie.
Here are two file manager windows open side by side.
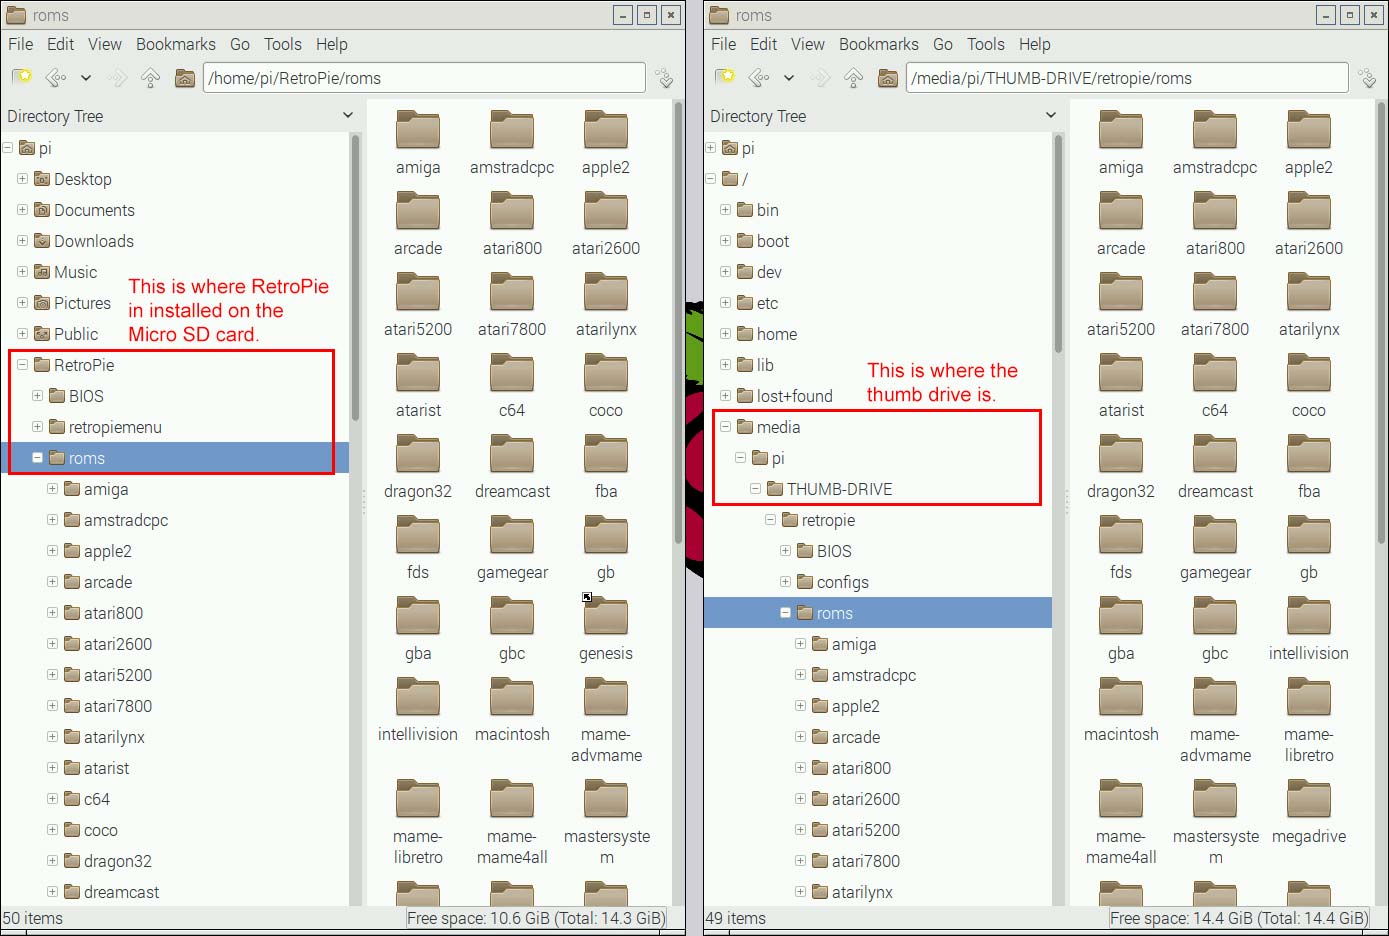
You will notice there are no icons for different drives like you would see on Windows. This can appear confusing at first but it's easy to understand. You can see at the top there are two folders. One is named "pi" the other is named "/". In the pi folder, there is a folder named RetroPie. This is where RetroPie is installed. Open the roms folder.
Step 5. Open another file manager window. Expand the "/" folder and you should see a folder named media. This is where any hard drives or thumb drives will show up. Open the roms folder or any folder you have roms in.
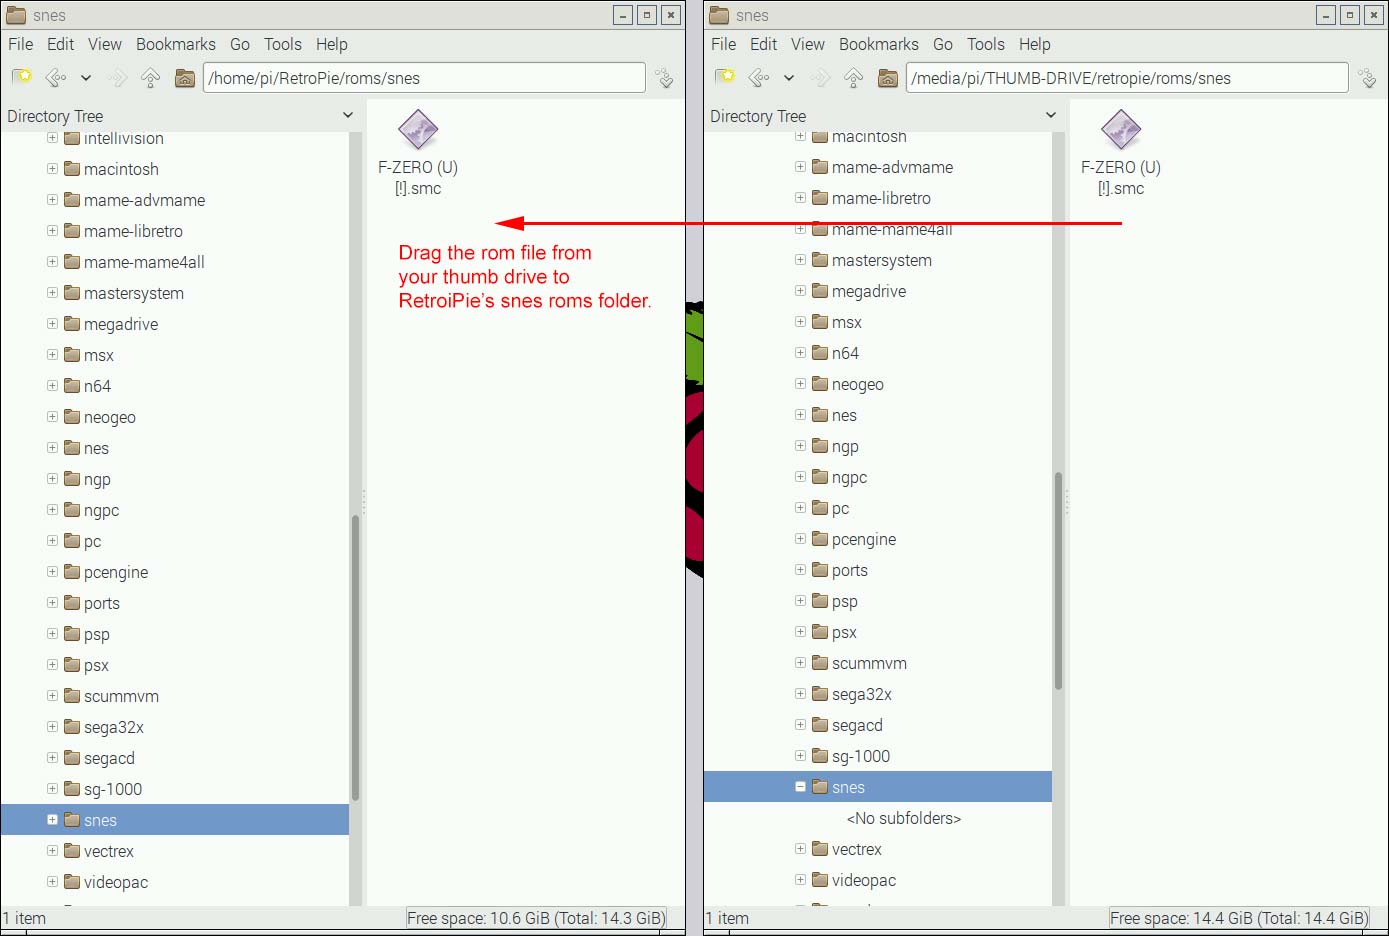
Step 6. Drag your rom over to RetroPie's rom folder. Done!
Step 7.
Exit the desktop, restart the pi and start playing games!